How Is A Freezer-Proof Paper Ice Cream Cup Actually Made?
Leave a message
How Is a Freezer-Proof Paper Ice Cream Cup Actually Made?
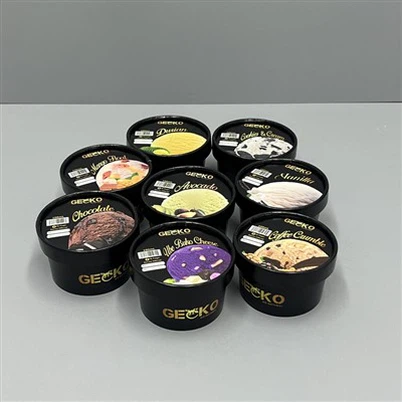
You serve delicious ice cream in a paper cup. But have you ever wondered how it holds a melting, frozen treat without turning into a soggy mess?
Paper ice cream cups are made in a multi-step process. First, designs are printed on flat paperboard. Then, a double waterproof coating is applied. Finally, the paper is cut, formed, and heat-sealed into a durable cup.

I remember the first time I stood on the floor of a high-speed cup manufacturing plant. The noise was incredible. Rows of machines were taking flat, printed sheets of paper and, in a blur of motion, turning them into perfectly formed cups. It looked like magic. But as an engineer, I know it is not magic. It is a precise sequence of steps, each one critical for creating a cup that can survive the freezer and delight your customers. This process is the secret behind every strong, reliable ice cream cup.
Why is printing done first, and not last?
You see a beautiful, vibrant design on a cup. But printing perfectly on a cone-shaped object seems impossibly difficult and expensive. You wonder how it's done.
Printing is always done first on large, flat rolls of paperboard. This method is faster, more precise, and far more cost-effective than trying to print on a finished, three-dimensional cup.

Before a cup starts to take shape, it's just a flat sheet of paper. We do all the printing at this stage. Think about it. It's much easier to print on a flat piece of paper than on an object that's already shaped like a cone. We use a method called Flexography, or "Flexo." It works like a very advanced, high-speed rubber stamp. We wrap flexible printing plates around big cylinders. Each cylinder applies one color of food-safe ink as the paperboard roll speeds through the press. This allows us to print thousands of impressions very quickly. The inks we use are special. They must be low-migration, which means they won't seep through the paper into the ice cream. Water-based or soy-based inks are common choices for this reason. The result is a giant, beautifully printed roll of paper, ready for the next step.
What makes an ice cream cup waterproof and freezer-proof?
A simple paper cup holding melting ice cream seems like a recipe for disaster. Condensation on the outside makes it even weaker, ready to collapse in a customer's hand.
A special double-coating process is the secret. An inner coating stops the ice cream from soaking in, while an outer coating protects the cup from condensation to keep it strong.

Raw paperboard is like a sponge. To make it hold ice cream, we must apply a waterproof barrier. This is the most important step for creating a "freezer-grade" cup. The key difference for ice cream cups is that we coat both sides of the paper. This is unlike a standard coffee cup which often only has an inner coating. The inner coating, usually made of Polyethylene (PE) plastic or the compostable alternative PLA, stops the melting ice cream from turning the cup soggy. But the outer coating is just as important. When you take a frozen cup out into warm air, condensation forms on the outside. This outer coating protects the paper from that moisture, keeping the cup strong and firm. It also helps prevent the cups from freezing together when they are stacked in a freezer. The process itself is called extrusion coating. We feed the printed paper roll through a machine that applies a molten curtain of PE or PLA onto the surface, bonding it perfectly.
How does a flat piece of paper become a cup?
You see the finished cup, but how does it get its shape? It seems like a complex process where any small error could create a cup that leaks from the bottom.
It's a high-speed automated process. A fan-shaped blank is heat-sealed into a cone, a bottom is inserted, and then the base and rim are tightly curled and compressed to create a leak-proof structure.

This is where the real magic seems to happen. After the paper is printed and coated, it's fed into a series of incredibly fast machines. First, a die-cutting machine punches out a fan-shaped piece for the cup's sidewall and a separate circle for the bottom. These individual "blanks" are then fed into the cup-forming machine. The fan-shaped blank is wrapped around a cone-shaped tool, and the edges are sealed together using intense heat or ultrasonic vibrations. This welds the PE or PLA coatings to create a perfect, leak-proof seam. Next, the circular bottom piece is inserted. Then, in the most critical step, the bottom edge of the sidewall is heated, curled under, and tightly compressed around the bottom disc. We call this "knurling," and it's what mechanically locks the bottom in place. Finally, the top edge is rolled over to form a smooth, strong rim. This rim adds huge structural strength to the cup. The finished cups are then automatically ejected and stacked.
How do you know if a cup will actually survive the freezer?
You're about to order thousands of cups. You trust they are strong, but one bad batch could lead to a wave of customer complaints and damage your brand's reputation.
We perform constant quality control checks, including a freeze-thaw cycle test. We freeze cups with liquid, thaw them, and repeat, checking for any weakness, leaks, or failure.

A cup might look perfect, but we have to prove it can handle the stress of being frozen. We perform a series of tough tests throughout the manufacturing process to ensure every cup is freezer-grade. The ultimate test is the Freeze-Thaw Cycle Test. We fill sample cups with liquid, freeze them solid for hours, and then let them thaw completely. We repeat this cycle to simulate the cup's entire life. We look for any sign of the coating separating from the paper or the seam failing. We also perform simpler, faster tests. For the Leak Test, we fill a cup with colored liquid and place it on white paper to see if any drops escape. For the Compression Test, a machine applies downward force until the cup crushes, ensuring it meets our strength standards. These tests are our guarantee that the cup you receive is built to perform.
Common Quality Control Tests
| Test Name | Purpose |
|---|---|
| Freeze-Thaw Cycle Test | Simulates freezer storage and use to check for structural failure. |
| Leak & Penetration Test | Verifies the integrity of the side and bottom seals. |
| Compression (Rigidity) Test | Ensures the cup is strong enough to handle scooping and stacking. |
| Rim & Seam Strength Test | Confirms the top rim and side weld are secure and won't peel apart. |
Conclusion
From printing a flat sheet to relentless freezer testing, manufacturing a quality ice cream cup is a process of precision. Every step is designed to deliver a strong, reliable product.